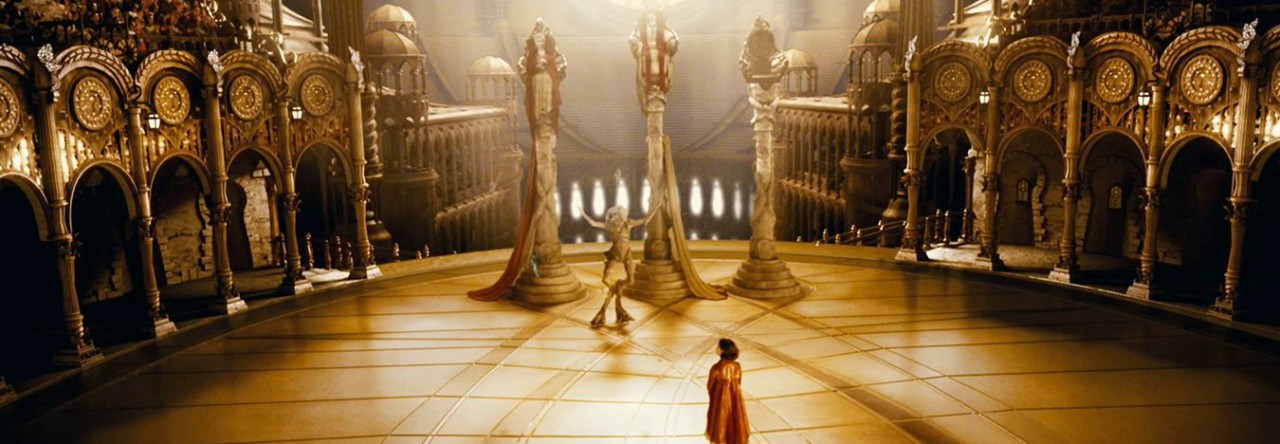
One of the movies I looked forward to the most in 2012 was Ridley Scott‘s Prometheus. Now the John Spaihts draft of the screenplay has leaked, which gives us an opportunity to examine what Scott and second screenwriter Damon Lindelof tweaked and changed for the finished film.
Category: Filmmaking Page 2 of 5
When writing scripts, we strive to write SHOTS. This means that a lot of work is put into writing blocks of visual storytelling that effortlessly situates characters and action in space. But when I go to the movies, I am sometimes completely put off by how utterly impossible it is to follow the geography of the images. Sure, sometimes this can be done for effect. But take Die Hard 4.0 … I don’t know who is where and doing what, half of the time.
Maybe I’m old-fashioned. Maybe this is just the way movies are these days. Or maybe there really is a trend in American cinema that moves away from staging comprehensible action. Even the venerable Kenneth Brannagh made a complete mess of geography with the sickeningly frantic cutting of Thor. And I’m not the only one to feel this way. While I don’t agree with everything in this artice by David Denby, it raises good points about the evolution of the visual language in American cinema.
What’s the point of writing good shots, if directors no longer see their value?

- Du liker en karakter fordi hun forsøker, ikke fordi hun lykkes.
- Du må fokusere på hva som er interessant for deg som publikum, ikke hva som er morsomt å skrive. Det kan være stor forskjell.
- Tema er viktig fra starten av, men du vil ikke oppdage hva historien egentlig handler om før du kommer til slutten. Så begynner du med bearbeiding.
- Det var en gang en/ei/et ___. Hver dag, ____. Så, en dag, ____. På grunn av det, så ___. På grunn av det, så ___. Men, så en dag ___.
- Forenkle. Fokusere. Kombiner karakterer. Hopp over omveier. Det kan føles som du mister noe verdifullt, men fortellingen settes fri.
- Hva er karakteren din god til, og komfortabel med? Kast dem ut i det totalt motsatte. Utfordre dem. Hvordan greier de seg?
- Dikt opp slutten før du lager midtdelen. Seriøst. Slutter er vanskelige, så få din til å funke tidlig i prosessen.
- Skriv ferdig fortellingen, gi slipp på den selv om den ikke er perfekt. Beveg deg stadig videre. Enda litt bedre neste gang.
- Når du står fast, lag ei liste over de tingene som i alle fall ikke kommer til å skje i fortellingen. Brått kan noe riktig dukke opp, og hjelpe deg videre.
- Plukk fra hverandre fortellinger du liker. Det er viktig at du finner ut nøyaktig hva som får deg til å like fortellingen, før du selv kan bruke noe lignende.
- Å få det ned på papiret gjør at du kan begynne å jobbe med det. En perfekt idé som forblir i hodet ditt kan du aldri dele med noen.
- Se bort fra det første du kommer på. Og det andre, tredje, fjerde, femte – få alt det opplagte ut av veien. Overrask deg selv.
- Gi karakterene dine overbevisninger. Passiv eller føyelig kan virke likandes på deg når du skriver, men for publikum er det ren gift.
- Hvorfor må du fortelle akkurat denne historien? Hva er det som brenner inne i deg som gir energi til denne fortellingen? Der finner du kjernen.
- Hvis du var denne karakteren, i denne situasjonen, hva ville du gjøre? Ærlighet gir troverdighet til utrolige situasjoner.
- Hva står på spill? Gi oss en grunn til å heie på karakteren. Hva skjer om de ikke lykkes? Gi dem så dårlige odds som mulig.
- Arbeid er aldri bortkastet. Om du ikke får det til å virke, gi slipp på det og gå videre. Det kan dukke opp igjen senere i andre sammenhenger.
- Du må kjenne deg selv, og vite forskjellen på å gjøre ditt beste og å pirke. Fortelling er utprøving, ikke raffinering.
- Tilfeldigheter som gir karakterene dine trøbbel er bra. Tilfeldigheter for å få dem ut av trøbbel er juks.
- Øvelse: Ta for deg byggeklossene til en film du misliker. Hvordan ville du sette dem sammen for å lage en fortelling du kan like?
- Du må identifisere deg med situasjonene og karakterene dine. Det er ikke nok å skrive kule scener. Hva kunne få deg til å handle slik?
- Hva er essensen av fortellingen din? Hva er den mest effektive måten å fortelle det på? Om du vet det, har du noe solid å bygge på.
We all know the routine. You’re watching a TV-show or a movie where something mysterious is happening. Our hero is urgently looking for answers and solutions. Suddenly a character pops up that is supposed to be enigmatic, but more often is just plain annoying. Our hero demands an explanation, but the annoying enigma-character just answers «You need to trust me. We don’t have much time.»
At this point I’ve seen this scene done badly so many times that my bullshit alarm goes off. It’s lazy writing, and a grim example of a writer baring the device inadvertently, through incompetence rather than conscious choice.
Trust is something you deserve, but cannot demand, in storytelling as well as in life. Through the annoying enigma-character, it’s really the writer that’s asking you, the viewer, to trust him. And when a storyteller reaches that point, he’s in pretty bad shape.
The confused writer may think that this device is totally valid. «I’m just creating mystery and suspense, and adding a sense of urgency,» the writer thinks. «And besides, it can’t really be that bad, since I’ve seen it used in almost every action or thriller series the past fifteen years.»
I’m sorry, but creating suspense and mystery isn’t supposed to be easy. It isn’t enough to just have a character say «We have to hurry!» to introduce pressure. And when you let your annoying character say «You need to trust me,» the subtext is «The writer doesn’t know the answer either. Or he is so lazy that he doesn’t bother telling stories without cheating by using stock lines and cliches from his tired bag of tricks.»
This doesn’t mean that I’m suggesting that the writer should give the audience all the answers right away. It means that mystery and suspense are advanced storytelling devices that need to be solved more elegantly.
Especially when it comes to a scene that’s about «I know the truth, but I’m not going to tell you,» the writer has a formidable challenge. The line between enigmatic and annoying is very thin indeed.
But while suspense and mystery in the hands of a poor writer is terribly annoying, they become art in the hands of the elegant and subtle storyteller. David Fincher’s Zodiac, for example, is a film about wasting years in a futile search for a truth that no one ever finds. It’s a crime mystery that does something very different than the genre norm. One might even say that Zodiac is to the crime genre what The Unforgiven was to the western genre.

HDSLR cameras shoot 16:9, which is fine, but sometimes you want a more cinematic look. The two perhaps most common ratios are 1.85:1 (Academy Flat) and 2.35:1 (Cinemascope). Read more about cinema aspect ratios here.
I edit in Premiere CS5, and there are two ways I can export my videos with wider aspect ratio. I can export with letterboxing (black stripes masking the upper and lower parts of the image), or I can crop the the video when I export with Media Encoder.
Let me show you how.
First, you need to see exactly what parts you’re cropping out. You do this by applying a mask with the appropriate aspect ratio to a video layer above your footage. You can do this in Premiere’s Title tool or in Photoshop. My video is full HD, that is 1920×1080 pixels – so I made a Photoshop document with those dimensions. Then I draw two black rectangles and place them at the upper and lower edges of the image. If I want to go Cinemascope I crop 132 pixels – so I make the rectangles 1920×132 pixels. (Note: this isn’t excactly 2.35, but close enough, and actually avoids some exporting problems.)
 Then I export this image as a PNG-file with transparent background, so only the black rectangles, the letterbox, is visible. You can download and use mine, if you like. Just click the image on the right to get the full size, and right-click to save.
Now you’re ready to import the mask into Premiere, and place it on top of all the other video layers.
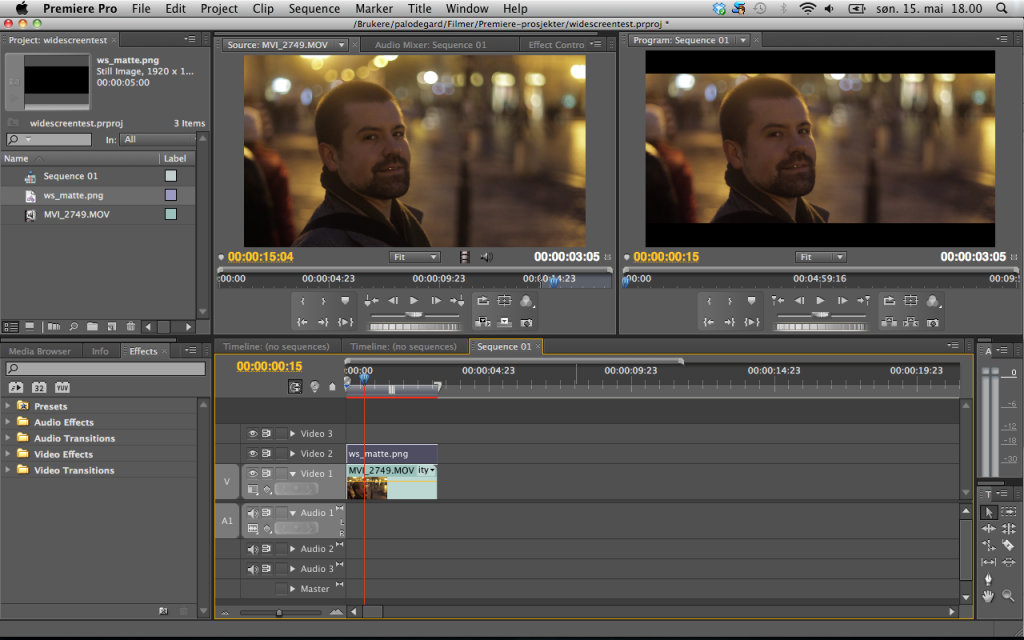
Here’s an example of mine, with the original footage seen in the source monitor (left) and the cropped image in the program monitor (right). Notice the matte being on the topmost layer in the timeline, and of course stretched to cover the entire length of the footage.
 Once you’ve done this you have some headroom to move your footage vertically. Make sure you don’t cut any heads or lose any valuable information.
Once you’ve positioned all your footage correctly and applied any effects and transitions, you’re ready to export. Go to File>Export>Media to open the Media Encoder.
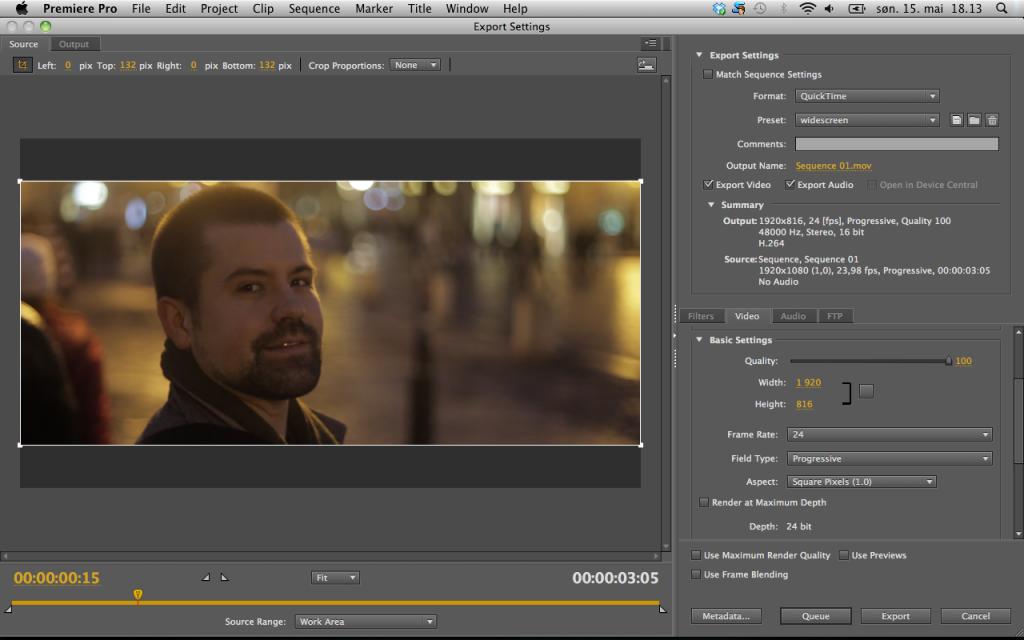
In your source monitor you have your cropping options above the image. Specify 132 px for top and bottom. Then choose your export settings, for example QuickTime H.264, and under Video>Basic Settings make sure you specify a width of 1920 and a height of 816. Make sure your frame rate and Field Type (Progressive) is correct, and your Aspect should be square pixels. To save some work next time, save your settings as a preset. Here are my settings:
 Now you can go ahead and export, and end up with a nice widescreen video without letterboxing. Videos of this type are great to upload to Vimeo, but YouTube always adds letterboxing anyway, I think.
Here’s Philip Bloom explaining how to do all this in Final Cut Pro:

